


In the digital era, where every click counts and data drives decisions, understanding your website’s performance is paramount. One of the key tools in a marketer’s toolkit is Google Tag, a powerful resource that enables conversion tracking. But how exactly do you harness its potential? Fear not,for this guide will walk you through the seamless process of installing the Google Tag,transforming your approach to monitoring user interactions and optimizing your campaigns. Whether your a seasoned pro or a curious beginner, unlocking insights into your conversion rates has never been more straightforward. Join us as we demystify the steps to set you on a path towards data-driven success!
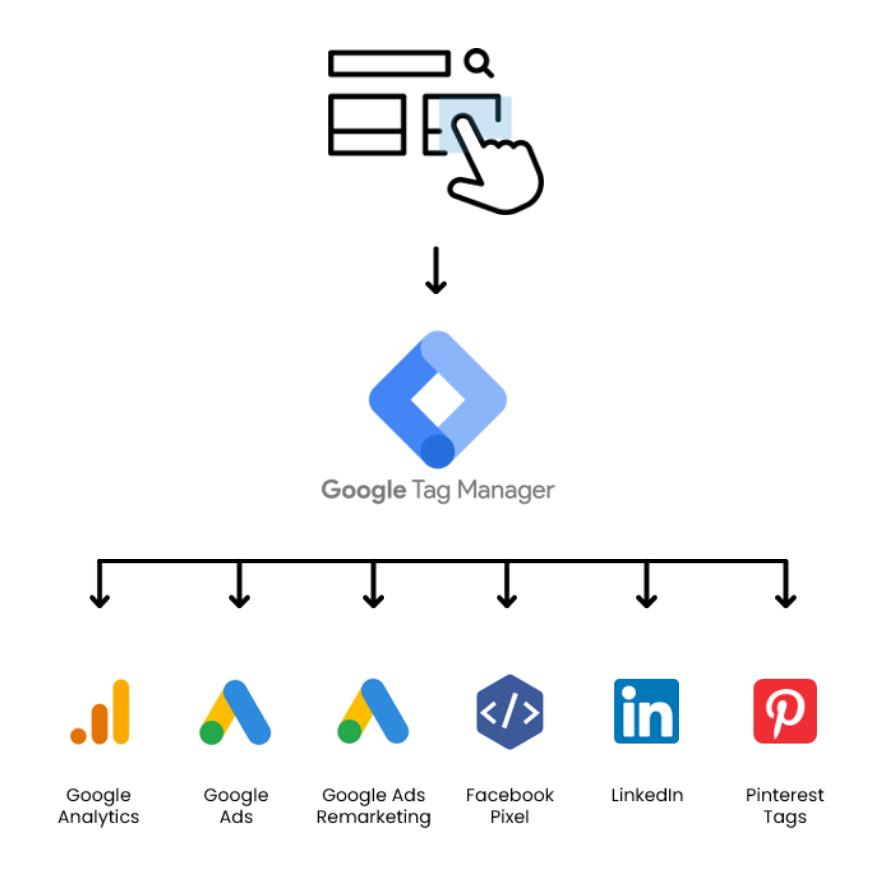
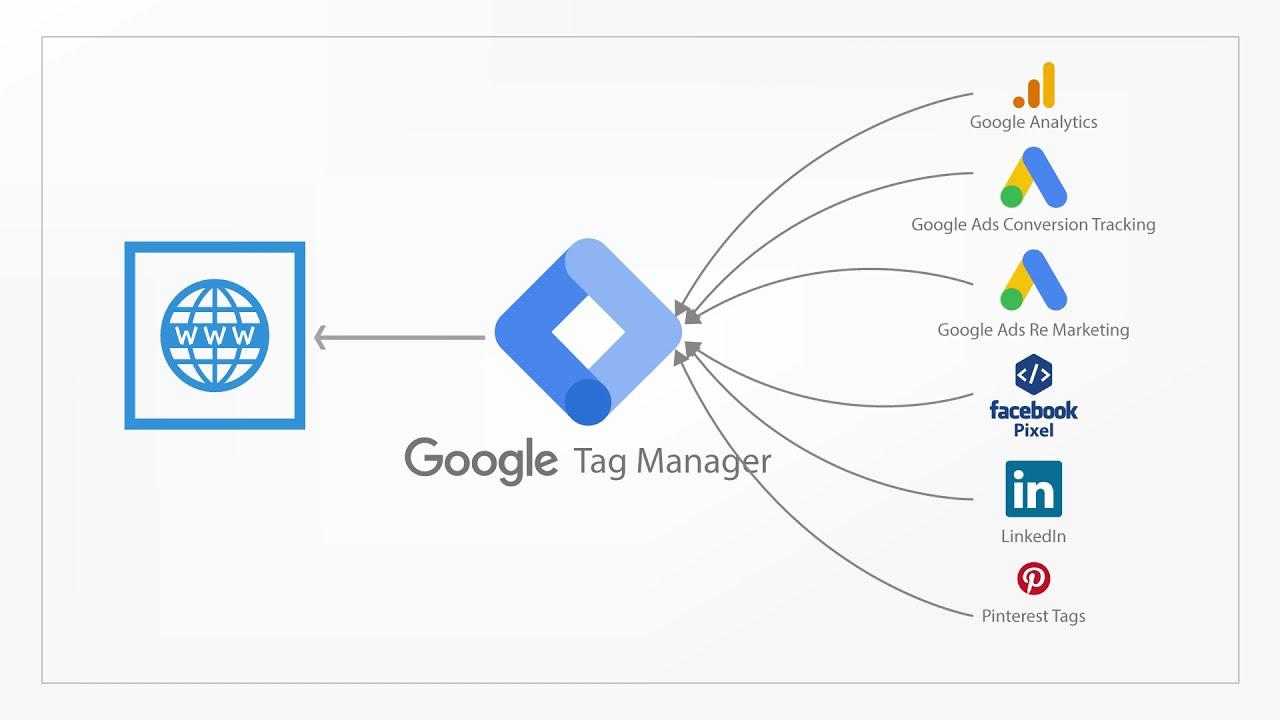
Google Tag and conversion tracking are essential components for any digital marketing strategy, allowing businesses to gain insight into user behavior and optimize their online efforts. At its core, a Google Tag is a small snippet of code that collects and sends data to Google products, including Google Analytics and Google Ads. This helps in monitoring how users interact with your website, providing vital information such as page views, button clicks, and form submissions. By setting up a Google Tag, you can also track specific actions that indicate a conversion, such as purchases or lead sign-ups, wich are essential for understanding the effectiveness of your marketing campaigns.
To get started with conversion tracking via Google Tag, it’s crucial to define your conversion goals. This could range from tracking newsletter sign-ups to completed transactions. Here are some steps to follow:
Below is a simple table summarizing common types of conversions you may want to track:
| Conversion Type | Description |
|---|---|
| Form Submissions | Track when users submit a contact or sign-up form. |
| Product Purchases | Monitor online sales and transaction completion. |
| Button Clicks | Identify clicks on call-to-action buttons, such as “Buy Now.” |
| Newsletter Sign-Ups | Capture when users subscribe to your email list. |
To begin the installation process of the Google Tag, first, you’ll need to sign in to your Google Tag Manager account. After logging in, navigate to the Admin panel located in the left-hand sidebar. Here, you will want to create a new container for your website, selecting the appropriate type based on where you plan to install the tag (e.g., Web or Mobile). Once the container is set up, you’ll be provided with a code snippet that must be added to your website. Ensure you place the head and body tags correctly, as this is critical for the tag to function properly.
Next, you’ll configure the Google Tag itself. Go back to your Google Tag Manager and create a new tag. Choose the Tag Type from the dropdown menu and select the relevant Conversion Tracking option based on your needs (like Google Ads). Once selected, fill in the required fields such as your conversion ID and any additional parameters. Following this, set up your Trigger, which determines when your conversion tag shoudl fire. save your tag and click Submit in the top right corner to publish your changes. It’s good practice to utilize the Preview Mode to test your tag and ensure it’s capturing conversions correctly.
To maximize the effectiveness of your conversion tracking with Google Tag, it’s essential to ensure that the tag is implemented correctly across all relevant pages. Start by incorporating event tags for specific interactions you want to measure, such as form submissions, downloads, or button clicks. This allows you to gather comprehensive data on user behavior. Additionally, apply trigger conditions smartly to ensure that the tags fire accurately.Only trigger them on pages where conversions are likely occurring, to avoid unnecessary data collection and maintain data integrity.
Another key practice is to test and validate your tags using tools such as Google Tag Assistant. Regularly audit your tags to confirm they are working as intended. This includes ensuring they send data to Google Analytics or any other platforms you may be using correctly. Moreover, make use of debugging features in Google Tag Manager to preview changes before publishing them. Consider implementing a structured naming convention for your tags and triggers, which can facilitate easier management and updates in the future.
When implementing Google Tag for conversion tracking, several common issues may arise that can hinder your tracking efforts. First, ensure that the Google tag Manager (GTM) container is correctly installed on your website. A missing or incorrectly placed GTM snippet is often a simple yet overlooked mistake. Check the following:
Another frequent concern is tracking configuration. Ensure that all relevant triggers and tags are properly set up in Google Tag Manager to fire based on the specified user interactions. If you’re not seeing conversion data, double-check the following points:
| Issue | Solution |
|---|---|
| No tags Firing | Verify that triggers are set correctly. |
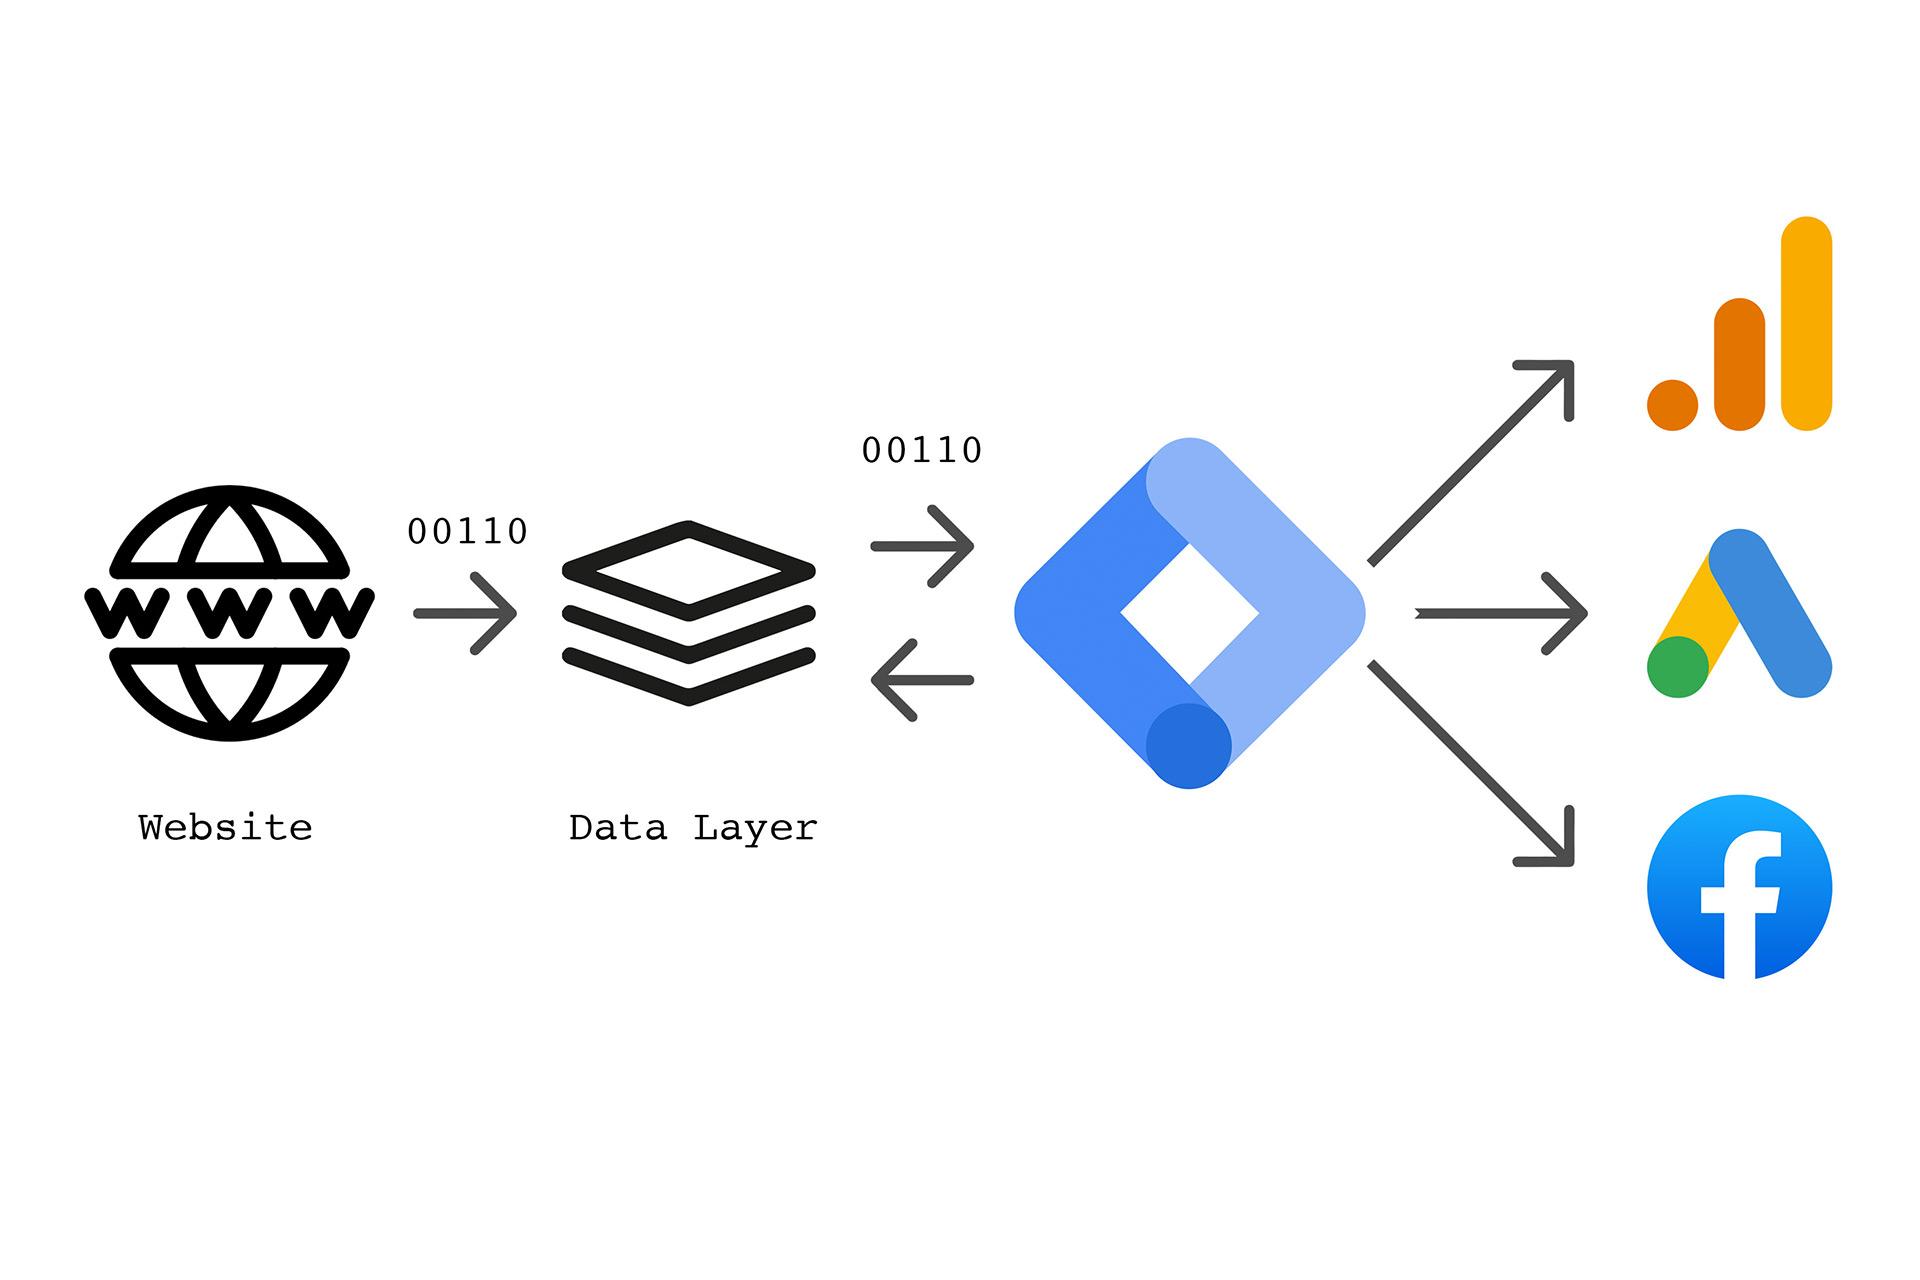
| Data Layer Not Pushing | Ensure data layer code is placed before GTM code. |
| Tag Configuration Errors | Check that all required fields are filled in. |
As we reach the end of this guide, you now hold the key to unlocking the power of conversion tracking with Google Tag. By successfully installing this essential tool, you’re not just enhancing your website’s analytics; you’re paving the way for data-driven decisions that can elevate your marketing strategies to new heights. Conversion tracking allows you to understand user behavior, optimize campaigns, and ultimately drive more meaningful interactions with your audience.
Remember, the world of digital marketing is ever-evolving, and keeping your tags in sync with your goals is crucial. As you continue to explore and implement Google Tag, keep experimenting, learning, and adapting. With each conversion tracked, you’ll gain valuable insights that could lead to meaningful improvements in your performance metrics.
Now, go forth and put your newfound knowledge into action. Happy tracking!